Customising task outcomes and flows on ADF
- Alfresco Hub
- :
- ADF - Forum
- :
- Customising task outcomes and flows on ADF
Customising task outcomes and flows on ADF
- Subscribe to RSS Feed
- Mark as New
- Mark as Read
- Bookmark
- Subscribe
- Printer Friendly Page
- Report Inappropriate Content
 This tutorial is part of the Introduction to the ADF APS components and details how to customise task outcomes and flows on ADF. Now that we know how to control the stencils (bundled and customised) as atomic parts of the forms into an ADF application, let’s see how to control the outcomes of a form and flows in general. Controlling the outcomes is a key factor for the management of a process. In this section in particular, we are going to cover this topic to complete the discussion around the process services in an ADF application.
Introduction of the form events in activiti-task-details
Task outcomes and flows can be controlled using the concept of events in the Alfresco ADF components. More in detail, the activiti-task-details component has four relevant events that can be used and customized:
formLoadedinvoked when form is loaded or reloaded.
formSavedinvoked when form is submitted withSaveor custom outcomes.
formCompletedinvoked when form is submitted withCompleteoutcome.
executeOutcomeinvoked when any outcome is executed (default behaviour can be prevented viaevent.preventDefault()).
These events are extremely useful, if you want to check or do something during the outcome from a form. For further details about these and others events, please refer to the ng2-activiti-tasklist documentation.
Below we will see with an example on executeOutcome as the most generic one. The other events can be tested and used with success, following exactly the same approach and customisations of the components.
Changing the view component
Considering that we have to customise the activiti-task-details component adding the executeOutcome event, the first task to do is to change the activiti-demo source code into the <my-adf>/app/components/activiti folder.
Below the changes to the activiti-demo.component.html file.
<activiti-task-details
  [taskId]="taskId"
  (formCompleted)="onFormCompleted($event)"
  (executeOutcome)="myOutcomeControl($event)"
  #activitidetails></activiti-task-details>
And the changes to the activiti-demo.component.ts file.
@Component({
  selector: 'activiti-demo',
  templateUrl: './activiti-demo.component.html',
  styleUrls: ['./activiti-demo.component.css']
})
export class ActivitiDemoComponent implements AfterViewInit {
 ...
  // Add this method.
  myOutcomeControl(event: any) {
    alert('Outcome pressed on button ‘' + event.outcome.name + '‘');
  }
  ...
}
As you can see, the changes in the HTML file setup the event controller to the method called myOutcomeControl and the changes to the TypeScript file develop what the method does. In our example: a very basic message to the user containing the button name, representing the outcome (Save or Complete, by default).
Task outcomes in action
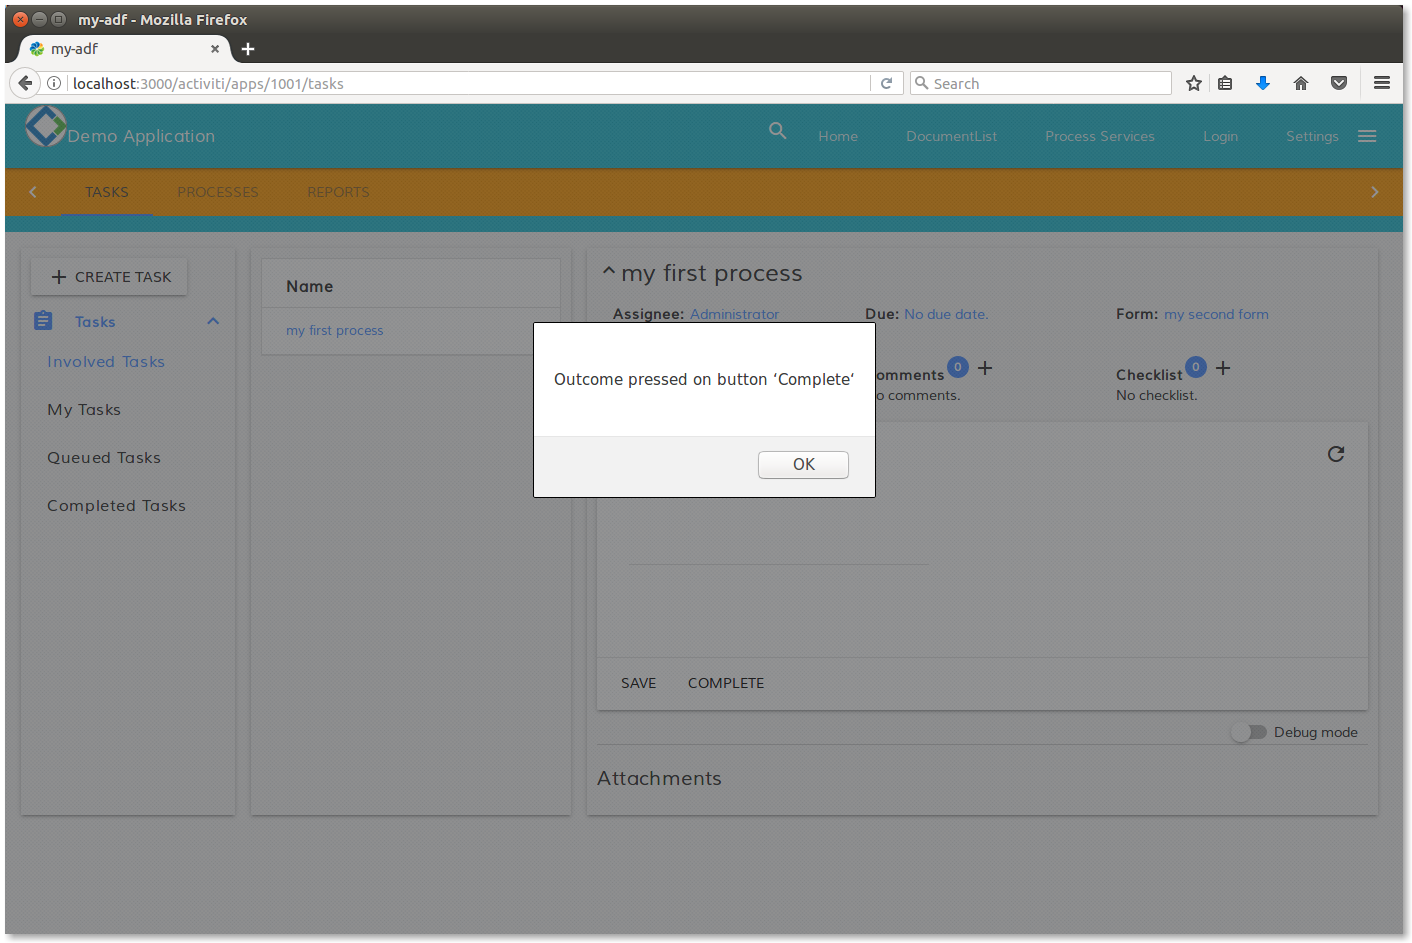
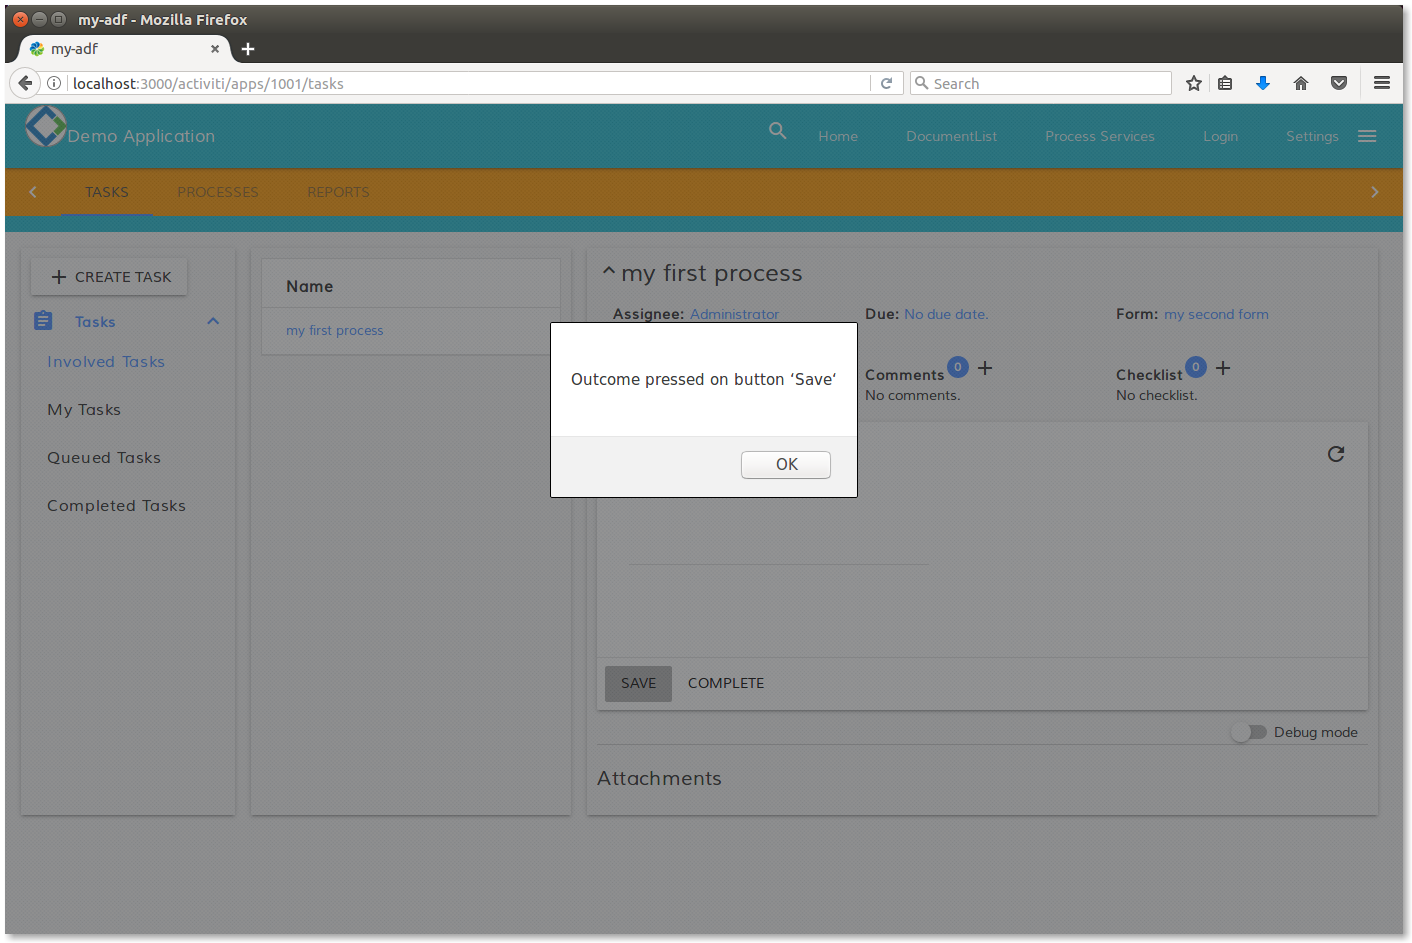
In the pictures below we can see two different screenshots, depending on the pressed button. The first, pressing the Complete button. The second, pressing the Save button.

Message shown pressing the Complete button.

Message shown pressing the Save button.
Before considering the example as completed, we would like to discuss a very common use case: the existence of tasks with several outcomes. As you probably know, APS can be easily configured to design a form with several (and customized) buttons and outcomes. This is not an issue for the ADF components and the solution discussed here will work also in this scenario.
Blog posts and updates about Application Development Framework (ADF).
- Extending the Alfresco Digital Workspace (ADW)
- Developing Take Ownership Extension for ACA 2.8.0
- Creating your first extension for Alfresco Content...
- ADF 4.0.0 is out!
- Hey Front-End Developer, what are your preferred o...
- We want to (thank and) reward our ADF contributors...
- How to update ADF from version 2.5.0 to 2.6.1
- Application Development Framework (ADF) 2.6.1 Rele...
- ADF 2.6.0 Release Note
- How to update ADF from version 2.4.0 to 2.5.0
- ADF 2.5.0 Release Note
- ADF 2.4.0 Release Note
- How to deploy an ADF APP
- How To Add The New Sidenav Layout Component In You...
- How to integrate ADF log service with Mixpanel an...
We use cookies on this site to enhance your user experience
By using this site, you are agreeing to allow us to collect and use cookies as outlined in Alfresco’s Cookie Statement and Terms of Use (and you have a legitimate interest in Alfresco and our products, authorizing us to contact you in such methods). If you are not ok with these terms, please do not use this website.
